Wrapping A Replacement Grip
Follow this tutorial when it's time to change up your replacement grip. First, you'll need a few simple tools.
- Needle-nose pliers and/or a narrow screwdriver to remove existing staple
- Scissors to trim grip and finishing tape
- Staple gun (optional) to secure grip to handle when starting.
Step-by-step guide
1. Remove old grip and staple using your needle-nose pliers or screwdriver. Make sure the handle is relatively clean and free of old grip material and/or adhesive.
2. If using a grip with a collar, slide the rubber collar on BEFORE wrapping the grip and push it up out of the way. This is much easier than trying to slide it over the wrapped grip.
 Wrapping for a right-hander
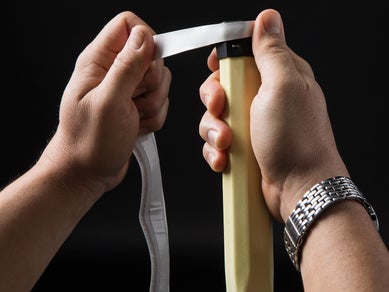 Wrapping for a
 left-hander
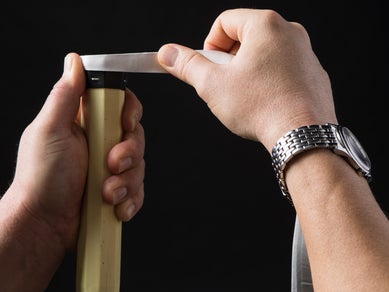
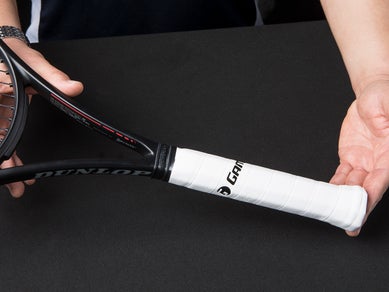
3. Remove about 12 inches of the tape backing and attach the tapered end of the grip (staple optional) to the butt cap. Be sure to secure the grip end to the same bevel as your old grip to reproduce the same feel. If your are wrapping for a right-hander, attach the grip so that you're pulling it to the right with the racquet upside-down (above, left). If wrapping for a left-hander, attach and pull the grip to the left (above, right).
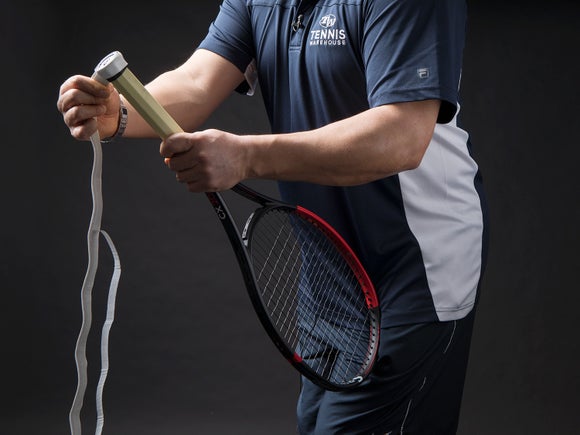
4. When wrapping the grip, keep the racquet head stable against your leg or hip. Holding the grip firmly with one hand, rotate the the racquet slowly with the other, overlapping about 1/16 inch. Unwrap the tape backing as you go to avoid the grip curling up and sticking to itself.
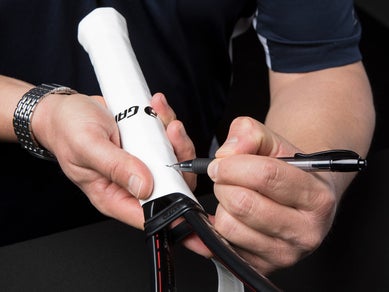
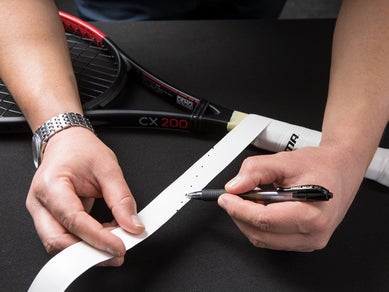
5. Once you've reached the top of the handle, draw a line straight around the grip with a pen or pencil, following the handle end (above). Unwrap the grip to reveal this line and trim the grip with scissors.
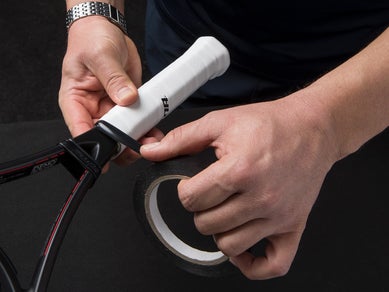
6. Secure the grip end with finishing tape (no staple necessary) and slide collar down.